Specification: .
| Body | 32 3 window coupe, roof chopped, suicide doors, recessed hinges, bear claw latches. |
| Chassis | Fabricated chassis |
| Engine | 350cu (5.7 litre) small block Chevy V8 with 350 automatic transmission. |
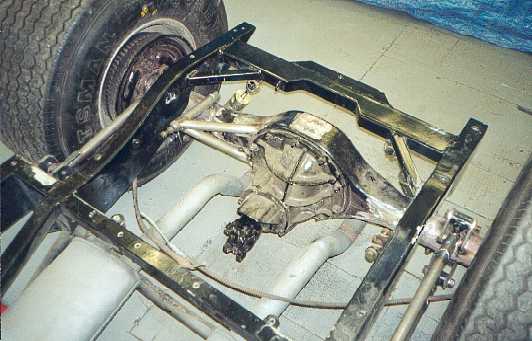
| Axle | Ford 9"with custom shafts. Propshaft by John Beardmore |
| Suspension | Front: Independent based on Volvo140, Mini steering rack. Beardmore built column. Rear: Beardmore built 5 link and coil overs. |
| Interior Trimming | Robin |
| Wiring | John |
Robin bought this car as a part finished project. The previous owner got to the stage of driving it down his drive but never got it on the road.
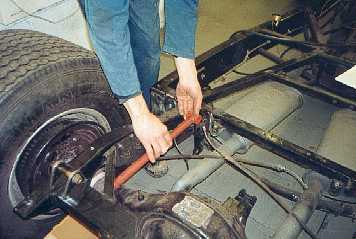
Robin will strip it down and check it over. The rear axle requires remounting, which I will do. Robin will concentrate on getting the body work looking good.
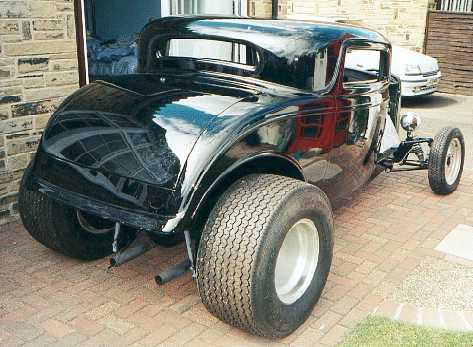
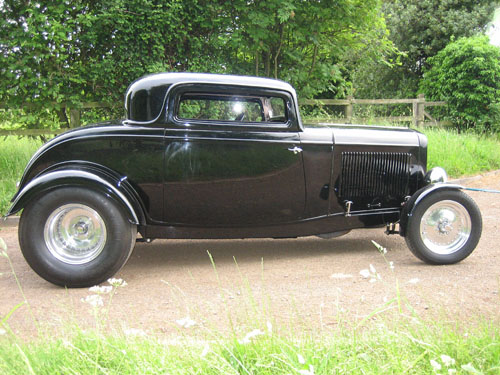
Traditional hot rod with big and littles.
--------------------------------------------------------------------------------------------------
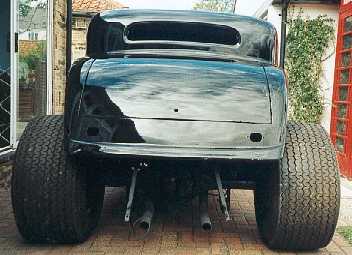
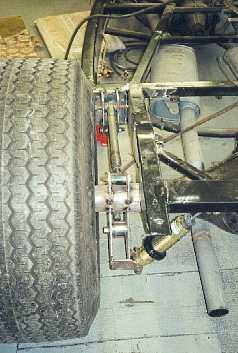
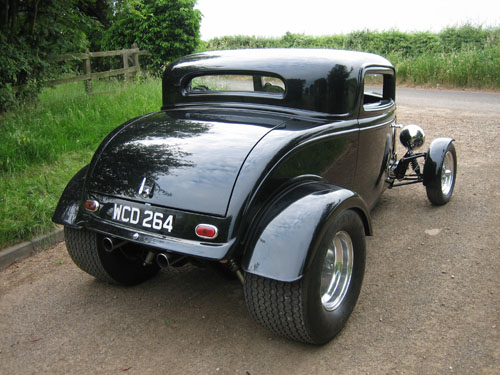
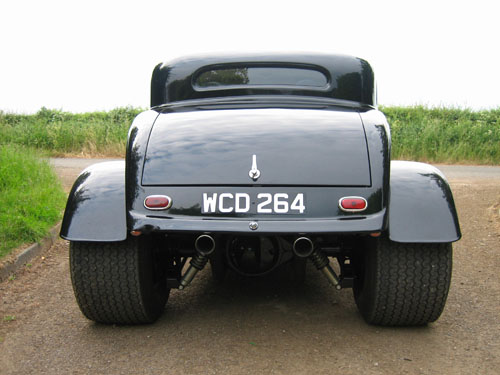
Rear view.
--------------------------------------------------------------------------------------------------
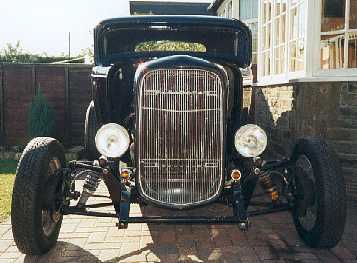
The front view. Thankfully it has independent front suspension, at least the
car has a chance of handling. I will check over the geometry, bump steer,
etc. and see what the roll centre height is and how it moves. A beam axle
may look cleaner but from a handling. point of view it is poor especially
on rough roads.
--------------------------------------------------------------------------------------------------
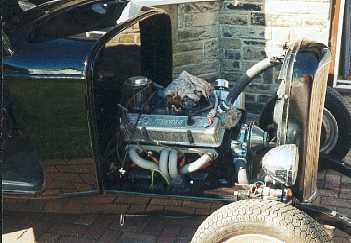
Hopefully all that will be required with the engine is oil and fire up.
Robin has a steel 4 piece hood.
--------------------------------------------------------------------------------------------------
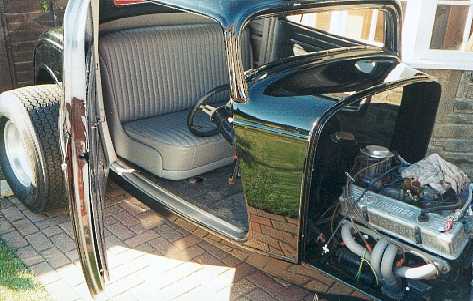
The interior has a beautiful bench seat, but the rest requires
work.
UPDATE 12th January 2004
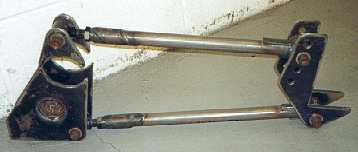
The rear axle is now remounted with new 4 links. These are longer and positioned
nearer the wheels
We also fitted new coilovers which allow lots more axle movement. I checked
for bump steer and it seems OK.
Robin has had the engine running.
The original 4 bars were on the inside of the chassis rail and quite short.
They mounted from the front of the axle.
--------------------------------------------------------------------------------------------------
This is the new 4 link ready to go onto the axle. We had the brackets
flame cut.
--------------------------------------------------------------------------------------------------
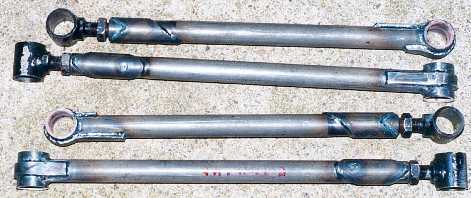
These are the new 4 links. I had to use the existing ends. Notice the reinforcing
pieces. These are used as welds should not be stressed in tension i.e. pulling.
The wrap around plates on the non adjustable ends also spread the loads. Notice
how the ends of the wrap around plate are offset on the tube.
At the adjustable ends I had to join two similar sized bits of tube. These
were
first butt welded then the sleeve slid over the top. The slash cut ends load
the welds
in shear. Plus there is a greater weld area. There are also plug welds through
the sleeve.
--------------------------------------------------------------------------------------------------
The new 4 link tacked in position.
--------------------------------------------------------------------------------------------------
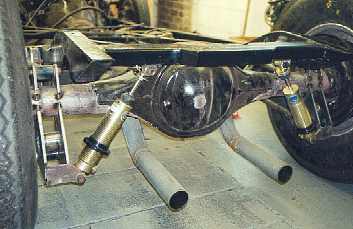
The new coilovers. The existing units did not allow much axle travel.
These units allow the axle to go right up to the chassis. We want lots of
travel with soft
springs for a good ride and traction. Notice the lower mount. Most people
mount
the coilovers in single shear (i.e. the bolt is supported on one side only),
this is bad
engineering practice. However with a little thought on the design it is possible
to get a double shear mount as here.
--------------------------------------------------------------------------------------------------
The original panhard rod was very short. This was probably just OK for the
small
amount of axle movement. However with our increased axle travel we wanted
a panhard rod as long as possible. So we put a new axle mount on very close
to
the chassis to get a long rod. The tubular mount is very strong. It upsets
me
slightly that the actual mount is in single shear, but to get a double shear
mount
here would have been very awkward. We will use a high strength aircraft spec
bolt
to compensate.
Other Work
Re plumb the brakes and fuel lines. Remount the petrol tank in the boot, position the steering wheel and remake the column,
fit bucket seats and mount them so its possible to see out, re core the radiator, polish the paint, trim the interior,
realign the front suspension, rewire, fit big head lights and fit the glass.
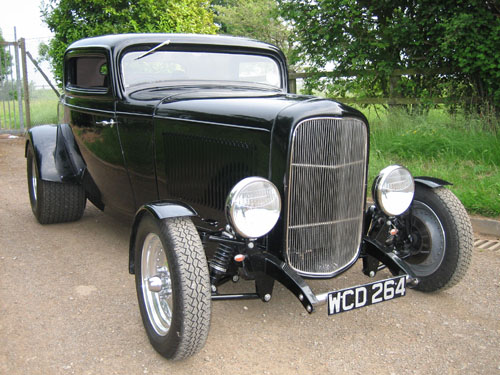
The finished car. We think that hot rods look so much better with big head lights. They were not
cheap but finish it off.
--------------------------------------------------------------------------------------------------
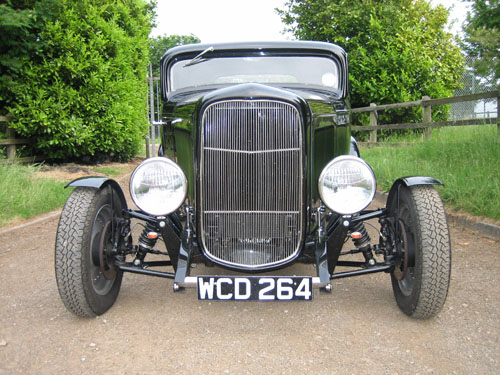
Note the subtle indicators in the corners.
--------------------------------------------------------------------------------------------------
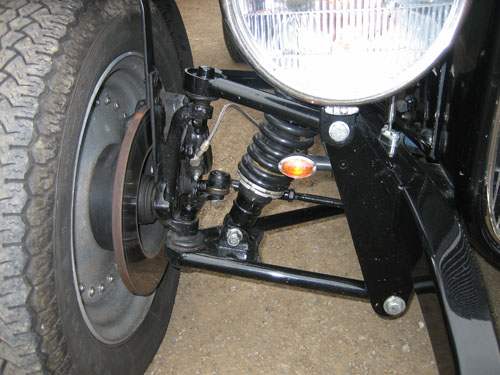
The front suspension. We made new braided brake hoses. I always fit banjo fittings on the caliper
as they are less susceptible to damage.
--------------------------------------------------------------------------------------------------
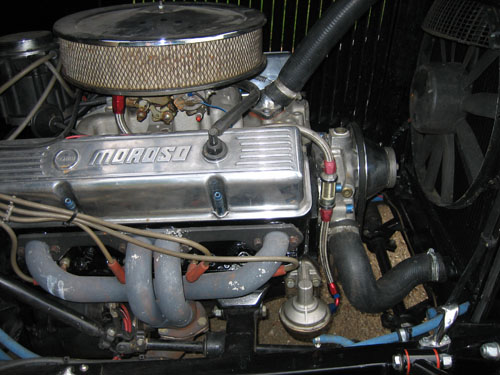
The small block Chevy. Note the new steering column running along the chassis rail.
--------------------------------------------------------------------------------------------------
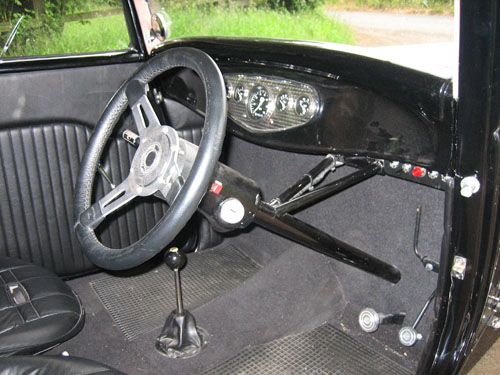
The new steering column. We positioned the wheel to give a comfortable driving position
and then made new mounts to suit. Robin trimmed up the door panels and the carpet.
The throttle pedal is Morris Minor, because we had it in stock!
--------------------------------------------------------------------------------------------------
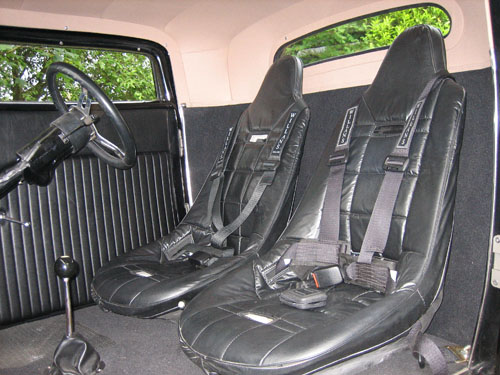
The beautiful bench seat unfortunately made you sit too high and you couldnt see out so Robin fitted
bucket seats. These are mounted low and the driving position is very good. Visibility out of the
small front screen is excellent. Robin made and trimmed the head lining, a very nice job.
--------------------------------------------------------------------------------------------------
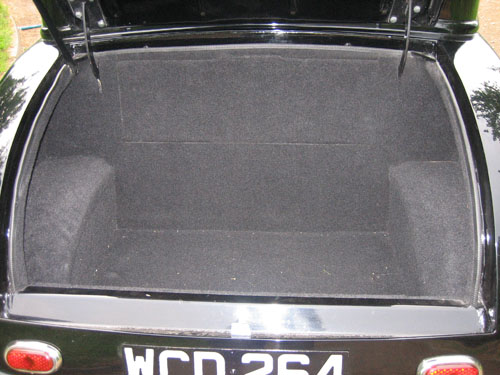
Robin also trimmed out the boot with carpet. The petrol tank sits behind the panel and the removable
section reveals the tank and storage. Again a very nice neat job.
Robin drove the car for a while and took it to a few shows. It attracted a lot of attention and he received an offer
he couldn't refuse and sold it. The money will go towards a new project...................